I still remember the first time I slid into the driver’s seat of my new SUV, the smell of fresh leather filling the air. It felt Stuart, that luxurious interior felt like a treat—until I noticed a greasy smudge from my hands on the steering wheel. How to clean a leather car interior? That question hit me hard as I stared at the mess, worried I’d ruin that beautiful leather.
If you’ve ever cringed at a stain on your car’s seats or wondered how to keep that leather looking sharp, I’m here to help. Let’s tackle this together, like we’re sitting in my garage, figuring out how to make your car’s interior shine again.
I’ve cleaned the leather in my SUV, my old Honda Civic’s vinyl seats (which I treated like leather), and even helped a friend with his fancy sports car. From sunscreen smudges to coffee spills, I’ve learned what works and what doesn’t through plenty of trial and error.
This guide is packed with my personal experiences, practical tips, and step-by-step instructions to help you clean your leather car interior safely and effectively.
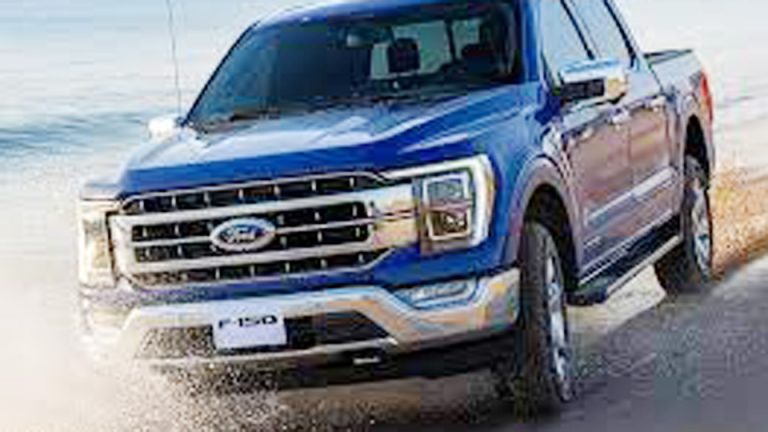
Image by huskyliners
Why Cleaning Leather Car Interiors Matters
Leather interiors are a step above the rest—soft, stylish, and a sign you’ve invested in your ride. But leather is also delicate. It’s prone to cracking, fading, and staining if you don’t care for it properly.
I learned this the hard way when I left a sunscreen stain on my SUV’s seat for too long, and it left a faint discoloration. Neglecting leather can turn a luxurious interior into a worn-out eyesore, lowering your car’s value and charm.
Regular cleaning keeps your leather supple, prevents damage, and maintains that new-car feel. Whether it’s daily dirt, food spills, or UV damage from sunlight, the right cleaning routine can protect your investment. Let’s start with the supplies you’ll need to do it right.
Gathering Your Cleaning Supplies
Before you start scrubbing, you’ll need the right tools. I keep a small kit in my garage for leather cleaning, and it’s saved me from countless messes. Here’s what I recommend:
- Microfiber cloths: Soft and non-abrasive, perfect for gentle wiping.
- Mild dish soap: Cuts through grease without being too harsh.
- White vinegar: A natural cleaner for tough stains.
- Leather cleaner: A specialized product for deeper cleaning.
- Leather conditioner: Restores moisture and protects the leather.
- Soft-bristled brush: For textured areas or stubborn dirt.
- Bucket of warm water: For mixing solutions and rinsing cloths.
- Cotton swabs: For tight spots like seams or buttons.
- UV protectant spray: Shields leather from sun damage.
These are household staples or affordable auto store finds. Having them ready makes cleaning easier and ensures you don’t damage your leather. Now, let’s get into the cleaning process for different scenarios.
Cleaning Everyday Dirt and Grime from Leather Seats
Daily use leaves dust, body oils, and dirt on your leather seats. I noticed this in my SUV after a summer of road trips—my seats looked dull and felt slightly sticky. Regular cleaning keeps them fresh and prevents buildup. Here’s how I do it.
Step-by-Step Cleaning for General Maintenance
Start by vacuuming the seats with a brush attachment to remove loose dirt. This prevents scratching the leather when you wipe it. Mix a solution of one part mild dish soap with four parts warm water.
Dip a microfiber cloth in the solution, wring it out well, and wipe the seats in small, circular motions. I learned to avoid soaking the leather—too much water can seep into seams and cause cracking. Focus on high-touch areas like armrests and headrests.
After wiping, use a clean, damp cloth to remove any soap residue. Dry thoroughly with a dry microfiber cloth to prevent water spots. Finish with a leather conditioner, applying it sparingly with a clean cloth and buffing it in. I do this every three months, and my SUV’s seats still look showroom-ready.
Why This Works – How to Clean a Leather Car Interior?
The dish soap gently lifts dirt and oils without stripping the leather’s finish. Drying thoroughly prevents moisture damage, and the conditioner restores suppleness, keeping the leather from drying out. This routine has kept my seats soft and vibrant for years.
Tackling Tough Stains on Leather Seats
Stains like sunscreen, coffee, or ink are trickier. I had a sunscreen mishap in my Civic that left a greasy spot on the passenger seat. It was stressful, but I found a method that worked without harming the leather.
Removing Sunscreen and Oily Stains
Blot the stain with a dry microfiber cloth to absorb excess oil. Mix equal parts white vinegar and water, then dab the stain with a cloth soaked in the solution. Vinegar breaks down oily residues like sunscreen.
Work gently to avoid rubbing the stain deeper. For stubborn spots, I used a leather cleaner with a soft brush, scrubbing lightly in circles. Rinse with a damp cloth, dry thoroughly, and apply conditioner.
I tackled that sunscreen stain in my Civic this way, and it disappeared without a trace. The key is acting fast—fresh stains are easier to remove.
Handling Ink or Dye Stains
Ink stains, like from a pen exploding in my SUV, are tough but not impossible. Dab the area with rubbing alcohol on a cotton swab—don’t soak it, as alcohol can dry out leather. Work in small sections, then wipe with a damp cloth to remove residue. Apply conditioner afterward to restore moisture. I saved my steering wheel this way, and it looked good as new.
Why These Methods Work
Vinegar and leather cleaner target specific stain types—oils and dyes—without damaging the leather’s finish. Rubbing alcohol is a last resort for ink, used sparingly to avoid drying. Conditioning afterward prevents cracking and keeps the leather soft.
Cleaning Leather Steering Wheels and Trim
Steering wheels, door panels, and dashboards take a beating from constant contact. My SUV’s steering wheel had a greasy film from sunscreen and hand oils, making it feel grimy. Here’s how I clean these areas.
Cleaning the Steering Wheel
Wipe the steering wheel with a dry microfiber cloth to remove loose dirt. Use a dish soap and water solution (same as for seats) on a cloth, wiping gently in circular motions. For textured areas, use a soft brush to get into grooves. I had to scrub my steering wheel’s stitching carefully to avoid fraying it. Rinse with a damp cloth, dry thoroughly, and apply a small amount of conditioner.
Cleaning Door Panels and Dashboards
Vacuum loose dirt, then wipe with the soap solution. For tight spots like buttons or vents, use a cotton swab dipped in the solution. I cleaned my SUV’s dashboard this way, and it went from dull to glossy. Finish with conditioner on leather trim and a UV protectant spray on dashboards to prevent fading.
Why This Works
The gentle soap solution cleans without stripping finishes, and the brush or swab gets into hard-to-reach spots. Conditioner and UV protectant keep these high-exposure areas from cracking or fading under sunlight.
Maintaining Perforated Leather Seats
Perforated leather, like in some luxury cars, is trickier because dirt gets trapped in the holes. A friend asked me to help with his BMW’s perforated seats, which looked dirty despite regular cleaning. Here’s what worked.
Cleaning Perforated Leather
Vacuum with a brush attachment to pull dirt from the perforations. Use a leather cleaner with a soft brush, working in small circles to lift debris from the holes. I was gentle to avoid stretching the perforations.
Wipe with a damp cloth, dry thoroughly, and apply conditioner. This method made my friend’s seats look pristine again.
Why This Works
The brush dislodges dirt from perforations, and the leather cleaner is formulated to clean deeply without harming the leather. Drying and conditioning prevent stiffness, especially important for perforated leather’s delicate structure.
Preventing Damage and Keeping Leather Clean
Cleaning is half the battle—preventing damage is key. Here are my go-to tips for keeping leather interiors in top shape.
Clean Regularly
Wipe down your leather every three months or after spills. I clean my SUV’s interior quarterly, and it prevents dirt from building up and causing wear.
Use Conditioner
Apply leather conditioner after every cleaning to restore moisture. I learned this after noticing faint cracks in my Civic’s vinyl seats from neglecting this step.
Protect from Sunlight
Park in the shade or use a windshield sunshade to block UV rays. I started using a sunshade in my SUV, and it’s kept the dashboard from fading.
Act Fast on Spills
Blot spills immediately with a microfiber cloth. I saved my seats from a coffee spill by acting quickly, preventing a permanent stain.
Avoid Harsh Chemicals
Stick to mild soap, vinegar, or leather-specific products. I once used a harsh all-purpose cleaner, and it dulled my Civic’s trim. Lesson learned.
A Quick Cleaning Checklist
Here’s a checklist I use to keep my leather cleaning organized:
| Task | Tools Needed | Key Tip |
|---|---|---|
| General Cleaning | Microfiber cloth, soap solution | Don’t soak the leather |
| Sunscreen/Oily Stains | Vinegar, leather cleaner, brush | Act fast to prevent discoloration |
| Ink/Dye Stains | Rubbing alcohol, cotton swabs | Use alcohol sparingly to avoid drying |
| Steering Wheel/Trim | Soap solution, brush, UV protectant | Focus on textured areas with a brush |
| Perforated Leather | Leather cleaner, soft brush | Vacuum first to remove trapped dirt |
This checklist keeps me on track and ensures I don’t miss a step. Keep it handy for your next cleaning session!
Special Cases: Delicate or Colored Leather
Some cars have unique leather, like light-colored or aniline leather, which needs extra care. I helped a friend with cream-colored leather seats that showed every speck of dirt. Here’s how to handle these cases.
Light-Colored Leather
Use a leather cleaner instead of dish soap to avoid discoloration. I cleaned my friend’s seats with a dedicated cleaner, applied with a microfiber cloth, and it lifted dirt without altering the color. Condition afterward to maintain softness.
Aniline or Suede-Like Leather
Aniline leather is uncoated and delicate. Use a dry microfiber cloth to blot dirt, then a specialized aniline cleaner with a soft brush. I helped a friend with his Porsche’s aniline seats, and gentle cleaning kept them flawless.
Keep Your Leather Interior Shining
Cleaning a leather car interior doesn’t have to be intimidating. With the right tools and techniques, you can tackle dirt, stains, and wear to keep your car looking luxurious. I’ve been stressing over a sunscreen smudge or a coffee spill, but each mess taught me how to care for my leather properly. From my SUV’s seats to my friend’s fancy BMW, these methods have restored that new-car feel time and again.
Don’t let stains or dirt dull your car’s interior. Grab a microfiber cloth, some mild soap, and a bottle of conditioner, and give your leather the care it deserves. You’ll be amazed at how good it feels to slide into a clean, soft, and shiny interior. So roll up your sleeves, put on some music, and let’s make your car’s leather look better than ever!
Common Questions About Cleaning Leather Car Interiors
What’s the best way to clean leather seats in a car?
Use a mild dish soap and water solution with a microfiber cloth for regular cleaning. For tough stains, try vinegar or a leather cleaner, then condition to restore moisture.
Can I use household cleaners on my car’s leather interior?
Avoid harsh cleaners—they can strip the leather’s finish. Stick to mild soap, vinegar, or leather-specific products to protect the material.
How do I remove sunscreen stains from leather seats?
Blot the stain, then use a vinegar-water mix or leather cleaner with a soft brush. Wipe clean, dry thoroughly, and apply conditioner to prevent drying.
How often should I clean my car’s leather interior?
Clean every three months or after spills to prevent buildup. Regular cleaning keeps leather soft and prevents cracks or fading.
Will cleaning damage light-colored leather seats?
Use a leather cleaner instead of soap to avoid discoloration. Test on a small area first, and always condition afterward to maintain the leather’s look.
How do I protect my leather interior from sun damage?
Park in the shade, use a sunshade, and apply a UV protectant spray to dashboards and trim. This prevents fading and cracking over time.