If you’ve got leather seats in your car, you know they’re a touch of luxury that makes every drive feel special. But keeping them clean? That’s a whole different story. I’ve had leather interiors in a couple of my cars over the years, and let me tell you, I’ve made my fair share of mistakes trying to keep them looking sharp.
From spills to scuffs, leather can take a beating, but with the right approach, you can keep it looking brand new. I’ve spent hours experimenting with cleaning methods, and I’m excited to share what I’ve learned about the best way to clean leather car interiors.
If you’re dealing with a fancy SUV or a classic coupe, this guide is for you. Let’s dive in and make those seats shine!
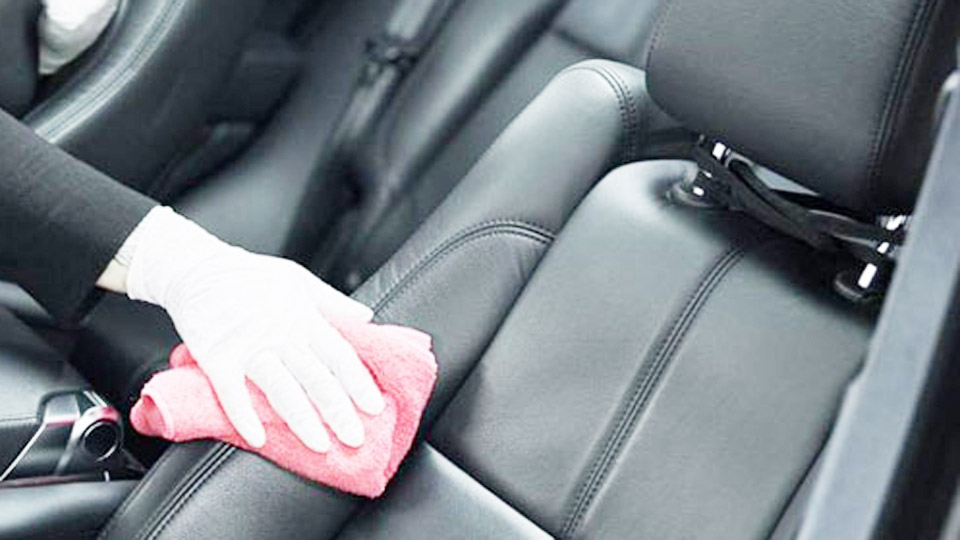
Photo by nonpaints
Why Leather Car Interiors Need Special Care
Leather seats aren’t like fabric—they’re delicate and need extra love. I learned this the hard way when I used a regular household cleaner on my sedan’s seats. Big mistake! The leather got dry and started cracking over time. Leather is a natural material, so it can dry out, fade, or get damaged if you don’t clean it properly.
Dirt, oils, and UV rays from the sun can wear it down, too. Regular cleaning keeps the leather soft, prevents cracks, and makes your car’s interior look amazing. It protects your investment—leather seats aren’t cheap! Let’s go through the best ways to clean them, based on what’s worked for me.
Gather the Right Supplies
Before you start cleaning, you need the right tools. I used to think any old cleaner would do, but that’s how I ended up with those dried-out seats. Here’s what I use now to get the job done right:
Leather cleaner: Pick one made specifically for car leather. I like brands like Meguiar’s or Chemical Guys—they’re gentle but effective.
Microfiber cloths: These are soft and won’t scratch the leather. I keep a stack in my garage.
Soft-bristled brush: A toothbrush or small detailing brush works great for seams and creases.
Leather conditioner: This keeps the leather hydrated after cleaning. I use Lexol or Armor All conditioner.
Vacuum with a brush attachment: To suck up loose dirt before you start.
Bucket of water: For rinsing cloths or diluting cleaners if needed.
Mild soap (optional): Like dish soap, for light cleaning in a pinch.
Spray bottle: Handy for applying cleaner evenly.
Having these ready makes the process smooth. Trust me, using the wrong stuff—like abrasive sponges—can ruin your seats.
Vacuum the Seats First
Before you touch the leather with any cleaner, vacuum it. I skipped this step once, and all I did was rub dirt deeper into the leather. Not cool. Use a vacuum with a brush attachment to gently remove dust, crumbs, and debris.
Pay attention to seams and creases where dirt loves to hide. I had a car with light-colored leather, and those seams were a magnet for grime. Vacuuming takes just a few minutes, but it makes a big difference. Go slow to avoid scratching the leather with the vacuum’s edge.
Test Your Cleaner
Here’s a lesson I learned the hard way: always test your cleaner first. I once used a new leather cleaner on my truck’s seats without testing, and it left a weird residue. Now, I always dab a small amount on a hidden spot, like under the seat or on the side.
Wait a few minutes to make sure it doesn’t discolor or damage the leather. Every car’s leather is different—some are coated, some are dyed—so testing saves you from a costly mistake. If the test spot looks good, you’re ready to clean.
Clean with a Leather-Safe Product
Now it’s time to clean. I start by applying a leather cleaner to a microfiber cloth, not directly on the seat. Spraying cleaner straight onto the leather can leave spots or soak it too much. Work in small sections—say, one seat at a time.
Rub gently in circular motions to lift dirt and stains. For tough spots, like ink or grease, I use a soft-bristled brush to scrub lightly. My sedan had a coffee spill once, and a brush got it out without harming the leather.
If you don’t have a leather cleaner, a tiny bit of mild dish soap mixed with water can work for light cleaning. But don’t overdo it—too much soap can dry out the leather. Rinse your cloth often to avoid spreading dirt around. I learned to keep a bucket of water nearby to keep things clean and efficient.
Tackle Tough Stains
Stains happen—food, drinks, even sunscreen can leave marks. I had a sunscreen stain on my SUV’s passenger seat that looked impossible to remove. For tough stains, use your leather cleaner with a soft brush. Apply a small amount and scrub gently in circles.
Don’t press too hard—you don’t want to damage the leather’s finish. If the stain won’t budge, try a specialized leather stain remover. I’ve used Meguiar’s for ink stains, and it worked like a charm. Be patient and work slowly to avoid making things worse.
Rinse and Wipe Down
After cleaning, wipe the seats with a clean, damp microfiber cloth to remove any leftover cleaner. I made the mistake of skipping this once, and my seats felt sticky for days. Use clean water and wring out the cloth so it’s just damp, not soaking.
Go over each section to make sure no residue is left behind. Then, dry the seats with a dry microfiber cloth. I usually leave the car doors open for a bit to let everything air dry completely.
Apply Leather Conditioner
This step is my favorite—it’s like giving your seats a spa treatment. Leather conditioner keeps the leather soft and prevents cracking. I use a product like Lexol or Chemical Guys conditioner. Apply a small amount to a microfiber cloth and rub it into the leather in thin, even layers.
Don’t glob it on—too much can make the seats greasy. I learned this when I over-conditioned my coupe’s seats, and they felt slick for weeks.
Work in small sections, massaging the conditioner in with circular motions. Let it sit for 10-15 minutes, then buff off any excess with a clean cloth. Your seats will look glossy and feel soft. I condition my leather every 3-4 months, or more often if I park in the sun a lot.
Protect Against Future Damage
Cleaning is only half the battle—protecting your leather keeps it looking great. UV rays, heat, and spills can damage leather over time. I started using a UV protectant spray after noticing my sedan’s seats fading from sun exposure. Products like 303 Aerospace Protectant work well.
Spray it on a cloth and wipe it over the seats to shield them from the sun. Parking in the shade or using a windshield sunshade also helps. I keep a blanket in my car to cover the seats when I know it’ll be parked in the sun all day.
Clean Regularly to Prevent Buildup
Leather needs regular cleaning to stay in top shape. I used to think I could clean my seats once a year and call it good, but dirt builds up fast. Now, I give my seats a quick wipe-down every month with a damp microfiber cloth and a full clean every 3-4 months.
It takes less than an hour and keeps the leather looking fresh. If you let dirt sit too long, it can embed in the leather and be harder to remove. Trust me, I learned this after neglecting my truck’s seats for too long.
Avoid Common Mistakes
I’ve made plenty of mistakes cleaning leather, so let me save you some trouble. Don’t use household cleaners like all-purpose sprays—they can strip the leather’s finish. Avoid paper towels or rough sponges; they can scratch.
Don’t soak the leather with too much water or cleaner—it can damage the stitching or cause mold. And never skip conditioning—dry leather cracks easily. I ruined a small patch of my first car’s seats by using a harsh cleaner, and it still bugs me when I think about it.
Comparing Leather Cleaning Products
Here’s a table to help you choose the right products for cleaning your leather car interiors:
| Product Type | Best For | Pros | Cons |
|---|---|---|---|
| Leather Cleaner | General cleaning, light stains | Gentle, safe for most leather | May need multiple passes for tough stains |
| Leather Stain Remover | Ink, grease, tough stains | Targets stubborn marks | Can be expensive, may require testing |
| Leather Conditioner | Hydrating, preventing cracks | Keeps leather soft, adds shine | Overuse can make seats greasy |
| UV Protectant Spray | Sun protection, preventing fading | Shields from UV rays, easy to apply | Needs reapplication every few months |
| Mild Soap and Water | Light cleaning in a pinch | Cheap, readily available | Can dry out leather if overused |
Step-by-Step Cleaning Process
Here’s how I clean my leather car interiors, step by step:
- Vacuum the seats. Use a brush attachment to remove loose dirt and debris.
- Test your cleaner. Dab a small amount on a hidden spot and check for damage.
- Apply leather cleaner. Put it on a microfiber cloth and rub gently in small sections.
- Scrub tough stains. Use a soft brush for stubborn marks, working carefully.
- Wipe off residue. Use a damp cloth to remove cleaner, then dry with a microfiber towel.
- Condition the leather. Apply conditioner with a cloth, let it sit, and buff off excess.
- Protect the leather. Use a UV protectant spray to shield against sun damage.
- Air dry. Leave the doors open for a bit to ensure the seats are fully dry.
This process takes about 45 minutes to an hour, depending on how dirty the seats are. It’s worth the effort to keep your interior looking sharp.
When to Call a Professional
Most leather cleaning is DIY-friendly, but sometimes you need a pro. If your seats have deep stains, bad cracks, or a damaged finish, a professional detailer can help. I took my SUV to a detailer once when a juice spill soaked into the leather and wouldn’t come out.
They used special tools and products to save the seat. Professional detailing costs $100-$300, depending on the job, but it’s worth it for tough cases. If you’re not sure, start with DIY cleaning and see how far you get.
Advice for Keeping Leather Interiors Pristine
Here’s what I’ve learned to keep leather seats looking great:
- Clean regularly. Wipe down seats monthly and do a full clean every 3-4 months.
- Condition often. Apply conditioner every few months to keep leather soft.
- Protect from the sun. Use a sunshade or park in the shade to prevent fading.
- Act fast on spills. Blot spills immediately to avoid stains setting in.
- Use the right products. Stick to leather-specific cleaners and conditioners.
- Keep a cleaning kit. Store microfiber cloths, cleaner, and conditioner in your car for quick touch-ups.
These habits make a big difference and save you from costly repairs down the road.
Conclusion
Cleaning leather car interiors doesn’t have to be a chore, and it’s so rewarding when those seats look and feel like new. I’ve spent years figuring out the best ways to keep my leather seats in top shape, from tackling coffee stains to preventing cracks in the hot sun.
With the right supplies, a little time, and some care, you can make your car’s interior shine like it just rolled off the lot.
Whether you’re prepping for a road trip or just want to impress your passengers, clean leather seats make every drive feel a bit more luxurious. Grab your microfiber cloth, put on some music, and give your seats the love they deserve. Here’s to a clean, comfy ride!
FAQs
Can I use regular household cleaners on leather car seats?
No, household cleaners can be too harsh and damage the leather. Stick to cleaners made for car leather to avoid drying or cracking.
How often should I clean my leather car seats?
I wipe mine down monthly with a damp cloth and do a full clean with leather cleaner every 3-4 months. It keeps dirt from building up.
What’s the best way to remove ink stains from leather?
Use a leather-specific stain remover and a soft brush. Dab gently and don’t scrub too hard. Test it on a hidden spot first.
Do I need to condition my leather seats after cleaning?
Yes, conditioning keeps the leather hydrated and prevents cracks. Apply a thin layer every few months after cleaning.
Can I use water to clean leather seats?
A little water with mild soap can work for light cleaning, but don’t soak the leather. Always follow with a conditioner.
How do I protect my leather seats from sun damage?
Use a UV protectant spray and park in the shade or use a sunshade. It helps prevent fading and cracking.
What should I do if my leather seats are cracked?
Minor cracks can be treated with a leather repair kit. For bad damage, a professional detailer can restore or reupholster the seats.