Experiencing your car pulling to the right when you brake hard can be alarming and dangerous. This issue not only compromises your vehicle’s safety but also signals an underlying problem in the braking or suspension system. Whether you’re a seasoned DIY mechanic or a driver looking to understand the issue before heading to a repair shop, this comprehensive 2000-3000 word guide will help you diagnose and fix the problem.
We’ll explore common causes like faulty brake calipers, restricted brake hoses, worn suspension components, and tire issues, providing step-by-step diagnostics and repair tips. By the end, you’ll have a clear understanding of why your car pulls right when braking hard and how to address it effectively.
The phenomenon of a car pulling to one side during hard braking is often linked to uneven brake force, mechanical wear, or alignment issues. This guide draws on expert insights from automotive resources and real-world diagnostics to offer practical solutions. Let’s dive into the causes, troubleshooting steps, and fixes to get your vehicle back to safe, smooth operation.
amainsider
Why Does Your Car Pull Right When Braking Hard?
When you apply the brakes forcefully, your car’s braking system is designed to slow all four wheels evenly, maintaining straight-line stability. If the car pulls to the right, it indicates that the braking force is stronger on the left side or weaker on the right, or that other mechanical issues are affecting the vehicle’s alignment or stability. The most common causes include:
Stuck or Faulty Brake Calipers: A seized or sticky caliper on the right side may not apply enough braking force, causing the left side to dominate and pull the car right.
Restricted Brake Hoses: A collapsed or clogged brake hose can limit fluid flow to the right-side brakes, reducing their effectiveness.
Uneven Brake Pad Wear: Worn or unevenly worn brake pads can create imbalanced braking forces.
Worn Suspension Components: Issues like worn bushings, ball joints, or tie rods can cause the car to veer under braking stress.
Tire Issues: Uneven tire pressure, mismatched tires, or tire conicity (a manufacturing defect causing tires to pull one way) can contribute to pulling.
Alignment Problems: Improper wheel alignment, especially after hitting a pothole, can exacerbate pulling during braking.
Brake Fluid Contamination: Contaminated or low brake fluid can affect hydraulic pressure, leading to uneven braking.
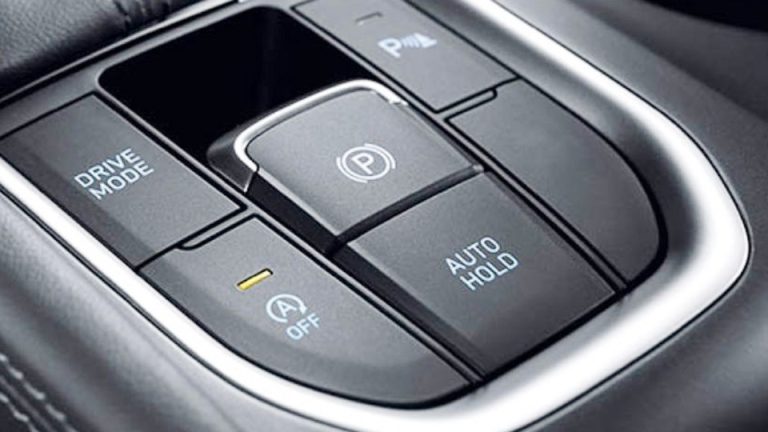
ABS System Malfunctions: A faulty anti-lock braking system (ABS) sensor or module can cause uneven brake application.
Understanding these causes is the first step to diagnosing and fixing the issue. Below, we’ll walk through a systematic approach to identify the root cause and provide actionable solutions.
Tools and Materials Needed
Before diagnosing or repairing, gather the following tools and materials:
- Jack and Jack Stands: To lift the vehicle safely for inspection.
- Lug Wrench: To remove wheels for brake and suspension checks.
- Socket and Wrench Set: For removing calipers, bolts, and other components (typically 10mm-19mm, depending on the vehicle).
- Brake Caliper Tool: To compress caliper pistons if replacing pads.
- Brake Fluid: Use the manufacturer-recommended type (e.g., DOT 3 or DOT 4).
- Tire Pressure Gauge: To check tire pressure consistency.
- Brake Cleaner and Rags: For cleaning brake components.
- Torque Wrench: To tighten bolts to manufacturer specifications.
- Wheel Alignment Tool (Optional): For basic alignment checks, though professional alignment is recommended.
- Penetrating Oil: To loosen stuck bolts or caliper pins.
- Safety Gear: Gloves, safety glasses, and sturdy shoes.
- Vehicle Repair Manual: For model-specific torque specs and procedures.
Safety Precautions
Working on your vehicle’s braking and suspension systems requires caution to ensure safety:
- Park on a Flat Surface: Engage the parking brake and use wheel chocks to prevent movement.
- Disconnect the Battery: For ABS-related checks, disconnect the negative terminal to avoid electrical issues.
- Use Jack Stands: Never work under a vehicle supported only by a jack.
- Handle Brake Fluid Carefully: Brake fluid is corrosive; avoid skin contact and clean spills immediately.
- Inspect Safely: Ensure all components are cool before touching, as brakes can be hot after driving.
- Test Drive Safely: After repairs, test the vehicle in a safe, open area to confirm the fix.
Step-by-Step Diagnosis
Follow these steps to pinpoint why your car pulls right when braking hard. Each step targets a common cause, starting with the most likely culprits.
Step 1: Check Tire Pressure and Condition
Measure Tire Pressure: Use a tire pressure gauge to check all four tires. Ensure they match the manufacturer’s recommended pressure (found on the driver’s door jamb or manual).
Inspect Tire Wear: Look for uneven wear patterns, which may indicate alignment issues or tire defects. Swap front tires side-to-side to see if the pulling direction changes, suggesting tire conicity.
Check Tire Type: Ensure all tires are the same brand, size, and tread pattern, as mismatched tires can cause pulling.
If the Issue Persists: Uneven tire pressure or conicity may contribute but is rarely the sole cause. Proceed to brake system checks.
Step 2: Inspect Brake Pads and Rotors
Remove Wheels: Jack up the vehicle, secure it with jack stands, and remove the front wheels to access the brakes.
Check Brake Pad Wear: Inspect the brake pads on both sides. Uneven wear (e.g., left pads more worn than right) suggests imbalanced braking force.
Examine Rotors: Look for scoring, warping, or uneven wear on the rotors. A warped rotor on the right side may reduce braking efficiency, causing a pull.
Measure Pad Thickness: Pads should have at least 3-4mm of material. Replace if worn unevenly or below the minimum thickness.
If the Issue Persists: Uneven pad wear may indicate a deeper issue, like a caliper or hose problem.
Step 3: Test Brake Calipers
- Inspect Caliper Movement: Check if the right-side caliper slides freely on its pins. A stuck or seized caliper may not apply enough force, causing the left side to pull.
- Check Piston Operation: Compress the caliper piston (with a caliper tool) to ensure it moves smoothly. A stuck piston can reduce braking force.
- Look for Leaks: Check for brake fluid leaks around the caliper, indicating a faulty seal.
Fix: Lubricate caliper pins with brake grease or replace a seized caliper. A rebuilt caliper costs $50-$150, while professional replacement ranges from $200-$400 per side.
Step 4: Examine Brake Hoses
- Inspect Hoses: Look for cracks, bulges, or soft spots in the brake hoses, especially on the right side. A collapsed hose restricts fluid flow, reducing brake force.
- Check for Blockages: Disconnect the hose (with a drain pan to catch fluid) and blow air through it to check for obstructions.
Fix: Replace damaged or restricted hoses. A new brake hose costs $20-$50, with labor adding $100-$200 if done professionally.
Step 5: Check Brake Fluid
- Inspect Fluid Level: Check the brake fluid reservoir under the hood. Low fluid can reduce hydraulic pressure.
- Check Fluid Condition: Contaminated fluid (cloudy or dark) can affect brake performance. Use a brake fluid tester if available.
- Bleed the System: Air in the brake lines can cause uneven braking. Bleed the brakes starting with the right front wheel, using a brake bleeder kit.
Fix: Flush and replace contaminated fluid with the correct type (e.g., DOT 3). A DIY flush costs $10-$20 for fluid; professional service is $80-$150.
Step 6: Inspect Suspension Components
- Check Bushings and Ball Joints: Worn bushings or loose ball joints on the right side can cause the car to veer under braking stress. Look for play or wear.
- Inspect Tie Rods: Loose or worn tie rods can affect steering stability, contributing to pulling.
- Test Control Arms: Worn control arm bushings can cause misalignment during braking.
Fix: Replace worn components. Bushings cost $20-$50 each, while ball joints or tie rods cost $50-$150. Professional labor adds $100-$300 per component.
Step 7: Verify Wheel Alignment
- Check for Misalignment: Misaligned wheels (especially toe or camber) can cause pulling, exacerbated by braking. Look for uneven tire wear as a clue.
- Professional Alignment: Take the car to a shop for a four-wheel alignment check. Misalignment often results from hitting potholes or curbs.
Fix: A professional alignment costs $75-$150. Ensure brakes and suspension are fixed first, as they can affect alignment.
Step 8: Test ABS System
- Check ABS Light: If the ABS warning light is on, a faulty sensor or module may cause uneven braking.
- Scan for Codes: Use an OBD-II scanner to check for ABS-related error codes.
- Inspect Wheel Speed Sensors: Dirty or damaged sensors on the right wheel can disrupt ABS function, causing pulling.
Fix: Clean sensors or replace faulty ones ($50-$100 each). Professional ABS diagnosis may cost $100-$200.
Step-by-Step Repair Guide
Once you’ve identified the cause, follow these steps to fix the issue. This example assumes a stuck caliper or restricted hose, the most common culprits.
Step 1: Prepare the Vehicle
- Park on a flat surface, engage the parking brake, and chock the wheels.
- Disconnect the negative battery terminal if working on ABS components.
- Jack up the front of the vehicle and secure it with jack stands.
Step 2: Replace Brake Caliper (If Faulty)
Remove the Wheel: Use a lug wrench to remove the right front wheel.
Remove Caliper Bolts: Use a socket or wrench to remove the caliper mounting bolts (typically 13mm-19mm).
Disconnect Brake Hose: Place a drain pan under the caliper and disconnect the hose, plugging it to prevent fluid loss.
Install New Caliper: Attach the new or rebuilt caliper, reconnect the hose, and tighten bolts to the manufacturer’s torque specs.
Bleed the Brakes: Use a brake bleeder kit to remove air from the system, starting with the right front wheel.
Step 3: Replace Brake Hose (If Restricted)
- Locate the Hose: Find the brake hose connecting the caliper to the brake line.
- Remove Old Hose: Disconnect it at both ends, catching fluid in a pan.
- Install New Hose: Attach the new hose, ensuring tight connections.
- Bleed the System: Bleed the brakes to remove air, as above.
Step 4: Replace Brake Pads and Rotors (If Needed)
- Remove Old Pads: Slide out the worn pads from the caliper.
- Inspect Rotors: Replace if warped or scored (cost: $50-$150 per rotor).
- Install New Pads: Insert new pads and compress the caliper piston with a tool.
- Reassemble: Reattach the caliper and wheel, tightening all bolts.
Step 5: Test and Verify
- Refill Brake Fluid: Top off the reservoir with the correct fluid type.
- Reconnect Battery: If disconnected, reattach the negative terminal.
- Test Drive: Drive in a safe area, braking gently at first, then harder to confirm the car stops straight.
Common Issues and Troubleshooting
- Pulling Persists After Caliper Replacement: Check the brake hose or opposite side caliper for issues.
- Brake Pedal Feels Soft: Air in the lines or low fluid; bleed the system thoroughly.
- Vibration During Braking: Warped rotors may need resurfacing or replacement.
- Suspension Noise: Worn bushings or ball joints may still cause pulling; inspect and replace.
Tips for Success
- Start with Simple Checks: Tire pressure and brake pad wear are easy to inspect and often contribute to pulling.
- Use Quality Parts: OEM or high-quality aftermarket parts ensure reliability.
- Consult a Manual: Check your vehicle’s repair manual for specific torque specs and procedures.
- Get Professional Help if Unsure: Brakes are critical for safety; a mechanic can diagnose complex issues.
- Regular Maintenance: Inspect brakes every 12,000-15,000 miles to prevent issues.
Vehicle-Specific Considerations
Different vehicles may have unique quirks:
- Ford F-150: Heavy trucks may stress suspension components, amplifying pulling. Check control arm bushings.
- Honda Civic: Compact cars often have sensitive alignment issues; verify toe settings.
- Toyota Camry: ABS sensor issues are common; clean or replace sensors if pulling persists.
- Chevrolet Silverado: Larger rotors and calipers may require more frequent maintenance.
Check your vehicle’s manual or online forums (e.g., Ford-Trucks.com, Honda-Tech.com) for model-specific advice.
When to Seek Professional Help
If you’re unable to diagnose or fix the issue, or if the problem involves complex components like ABS modules or major suspension repairs, consult a professional mechanic. Brake and suspension issues are safety-critical, and improper repairs can lead to accidents. A professional diagnosis typically costs $50-$150, with repairs ranging from $200-$1,000 depending on the issue.
Frequently Asked Questions
Q: Can I drive if my car pulls right when braking?
A: Limited driving to a repair shop is okay, but avoid hard braking and address the issue promptly for safety.
Q: How much does it cost to fix pulling when braking?
A: Costs vary: $50-$150 for DIY caliper/hose replacement; $200-$800 for professional repairs.
Q: Can tire issues cause pulling when braking?
A: Yes, uneven pressure or tire conicity can contribute. Check tires first.
Q: How do I know if it’s a caliper or hose issue?
A: Inspect for stuck caliper pistons or restricted hose flow. A mechanic can confirm with a pressure test.
Q: Does alignment affect braking pull?
A: Yes, misalignment can exacerbate pulling, especially if suspension components are worn.
Conclusion
A car pulling to the right when braking hard is a common but fixable issue that stems from uneven brake force, worn suspension, tire problems, or alignment issues. By systematically diagnosing the problem—starting with tires, brakes, and suspension—you can identify and resolve the cause with confidence. Whether you tackle the repair yourself or seek professional help, addressing this issue promptly ensures your vehicle remains safe and reliable.
Use the steps outlined in this guide to troubleshoot and fix the problem, and always prioritize safety when working on brakes. If you’re unsure or the issue persists, a trusted mechanic can provide expert diagnosis and repairs. Keep your vehicle in top shape, and enjoy the peace of mind that comes with safe, straight braking!