Bleeding brakes with a Hydroboost system isn’t your average weekend DIY job—it’s a bit trickier than the traditional vacuum or manual bleed, but once you understand how it works, it’s absolutely doable. I’ve tackled this job multiple times, and the first time I did it, I’ll admit—I was a little intimidated. Between the power steering lines and the unique setup of the Hydroboost system, it felt like a different animal.
But after getting my hands dirty, making a couple of mistakes, and finally getting it right, I realized it’s all about patience, precision, and knowing the correct steps. I’m going to walk you through the exact method I use, step by step, so you can get a firm, reliable brake pedal and a safer ride without the stress. If I can do it in my own garage, so can you.
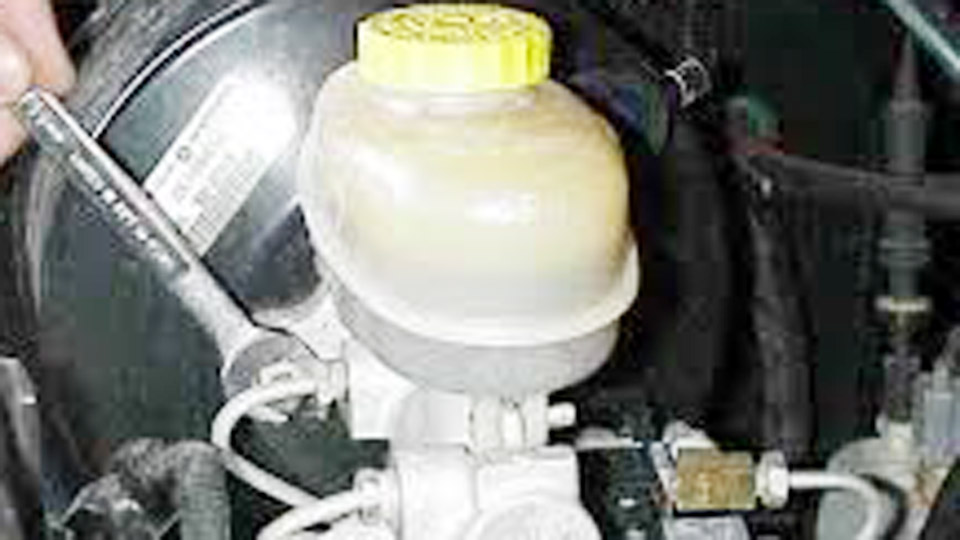
Image by jeepspecs
What Is a Hydroboost Brake System?
Before we get our hands dirty, let’s talk about what a hydroboost system is. Unlike standard brake systems that use engine vacuum to assist braking, hydroboost uses hydraulic pressure from the power steering pump.
It’s common in heavy-duty vehicles like trucks, SUVs, and some performance cars because it provides strong braking power for big loads or towing. My Dodge Ram has a hydroboost system, and I noticed the difference in brake feel compared to my Honda Civic’s vacuum system—it’s firmer and more responsive.
When air gets trapped in the brake lines or hydroboost unit, your pedal can feel soft, mushy, or even sink to the floor. Bleeding the brakes removes that air, but with hydroboost, you also need to bleed the hydraulic system tied to the power steering.
I learned this the hard way when I skipped a step on my neighbor’s Chevy Silverado, and the brakes still felt off. Let’s break down how to do it right.
Why You Need to Bleed Brakes with Hydroboost
Air in the brake lines is bad news—it makes your brakes less effective and can be dangerous. With a hydroboost system, air can also get into the power steering lines, causing issues like a stiff steering wheel or weak brakes. Here’s why bleeding is crucial, based on my experience:
- Spongy Brake Pedal: Air compresses, making the pedal feel soft. I had this on my Ram after a brake line repair.
- Reduced Braking Power: Air reduces hydraulic pressure, so your truck doesn’t stop as quickly. My friend’s F-250 struggled with this after a fluid change.
- Power Steering Issues: Air in the hydroboost can affect steering. I noticed this on a Chevy I worked on—steering got heavy until we bled it properly.
- Safety: Properly bled brakes are critical for safe driving, especially when towing or hauling heavy loads.
Bleeding brakes with hydroboost is a bit trickier than a standard system, but with the right steps, you’ll get that firm pedal back.
Tools and Supplies You’ll Need
To bleed brakes with hydroboost, you need some basic tools and supplies. Here’s what I keep ready in my garage:
- Wrench or socket set: For bleeder valves (usually 8mm-10mm).
- Bleeder wrench: A specialized wrench for tight bleeder valves.
- Clear plastic tubing: To catch brake fluid from bleeder valves.
- Catch bottle or container: To collect old fluid.
- Brake fluid: Check your manual for the right type (usually DOT 3 or DOT 4).
- Power steering fluid: For topping off the hydroboost system (check your manual).
- Jack and jack stands: To lift and secure the vehicle.
- Lug wrench: For removing wheels.
- Gloves and safety glasses: To stay safe from fluid spills.
- Helper: A second person to pump the brake pedal makes it easier.
- Optional: Vacuum pump kit: For vacuum bleeding, if you prefer.
I learned to keep a catch bottle handy after spilling brake fluid on my driveway while bleeding my Ram’s brakes—messy lesson! Always use the correct fluids for your vehicle to avoid damage.
Step-by-Step Guide to Bleeding Brakes with Hydroboost
Here’s how I bleed brakes with a hydroboost system, based on years of working on trucks like my Ram and friends’ vehicles. This process assumes you’re bleeding all four brakes and the hydroboost unit. Always start with the wheel farthest from the master cylinder (usually rear passenger side). If you’re new, take it slow and double-check each step.
Step 1: Prepare Your Vehicle and Workspace
Park your car on a flat surface and engage the parking brake. Pop the hood and locate the brake fluid reservoir and power steering reservoir. Check both fluid levels—top off with the correct brake fluid and power steering fluid if needed.
I always do this on my Dodge to avoid running dry during bleeding. Gather your tools, put on gloves and safety glasses, and ensure your helper is ready.
Step 2: Jack Up the Vehicle and Remove Wheels
Loosen the lug nuts on all four wheels, but don’t remove them yet. Jack up the vehicle and secure it with jack stands—never work under a car held only by a jack. Remove the wheels to access the brake bleeder valves. I had a close call with my Chevy when a jack stand wobbled, so double-check stability.
Step 3: Start with the Farthest Wheel
Begin at the rear passenger side (farthest from the master cylinder). Locate the bleeder valve on the brake caliper (a small screw on the caliper body). Attach clear plastic tubing to the valve and place the other end in a catch bottle. I use a bottle with a little brake fluid in it to keep air from sneaking back in. This worked great on my F-250.
Step 4: Bleed the Brake Lines
Have your helper pump the brake pedal 3-4 times, then hold it down firmly. With the pedal held, open the bleeder valve a quarter-turn using your wrench. Fluid and air bubbles will flow into the tubing. Close the valve before your helper releases the pedal.
Repeat until no bubbles appear—usually 4-6 cycles. I did this on my Ram, and it took about five rounds to get clear fluid. Top off the brake fluid reservoir as needed to avoid sucking in air.
Step 5: Move to the Next Wheel
Work in this order: rear passenger, rear driver, front passenger, front driver. Repeat the bleeding process for each wheel. My Jeep’s brakes felt firmer after each wheel, but it wasn’t perfect until we bled all four. Keep checking the brake fluid level to prevent it from running dry.
Step 6: Bleed the Hydroboost Unit
Now for the hydroboost part—this is what makes it different. Locate the hydroboost unit (usually near the master cylinder, connected to power steering lines). Some units have bleeder valves; others require bleeding through the power steering system. Here’s how I do it:
- Check for Bleeder Valves: If your hydroboost has bleeder screws (like some Ford trucks), attach tubing and a catch bottle, then have your helper turn the steering wheel back and forth while you open the valve slightly. Close it when no bubbles appear. I did this on a friend’s F-350, and it cleared air from the system.
- No Bleeder Valves: If there’s no valve (like on my Ram), bleed the power steering system. Start the engine, turn the steering wheel fully left and right several times (don’t hold it at the stops), and check the power steering fluid level. Top off as needed. I had to do this twice on my Chevy to get all the air out.
Step 7: Check the Brake Pedal
After bleeding all wheels and the hydroboost, pump the brake pedal a few times. It should feel firm, not spongy. If it’s still soft, repeat the bleeding process—there might be more air. My Toyota needed a second round because I missed a bubble in the rear line.
Step 8: Reinstall Wheels and Test Drive
Put the wheels back on, hand-tighten the lug nuts, and lower the car. Tighten the lug nuts to spec (usually 80-100 ft-lbs) with a torque wrench. Check brake fluid and power steering fluid levels again, then take a short test drive at low speeds. I test-drove my Ram in a parking lot to confirm the brakes felt solid and steering was normal.
Time and Cost of Bleeding Brakes with Hydroboost
How long does this take? For a beginner with a helper, expect 1.5-3 hours for all four wheels and the hydroboost unit. With experience, I can do it in 1-2 hours. Solo vacuum bleeding might take longer.
Here’s a cost breakdown based on my experience:
| Item | Estimated Cost | Notes |
|---|---|---|
| Brake Fluid (DOT 3/4) | $10-$20 | Enough for one bleed |
| Power Steering Fluid | $5-$15 | For topping off hydroboost |
| Clear Tubing | $5-$10 | Reusable for future bleeds |
| Catch Bottle | $5-$15 | Can be a DIY container |
| Bleeder Wrench | $10-$20 | Optional but handy |
| Professional Service | $100-$250 | If you hire a mechanic |
I saved about $150 bleeding my Ram’s brakes myself, but a shop is worth it if you’re not confident.
Common Issues When Bleeding Brakes with Hydroboost
Bleeding brakes with hydroboost can have hiccups. Here’s what I’ve run into:
- Stubborn Air Bubbles: Air can hide in the hydroboost or lines. I had to bleed my Chevy’s hydroboost twice to get it all out.
- Low Fluid Levels: Running the reservoir dry sucks in more air. I made this mistake on my Jeep and had to start over.
- Sticky Bleeder Valves: Rusty valves can be tough to open. I used penetrating oil on my F-250’s valves to loosen them.
- Soft Pedal After Bleeding: Usually means missed air. I had to re-bleed my Toyota’s rear brakes to fix this.
Why Hydroboost Systems Are Trickier to Bleed
Hydroboost systems are more complex than vacuum boosters because they tie into the power steering system. Air in the hydroboost or power steering lines can affect both braking and steering. I noticed this on my friend’s Silverado—steering felt heavy until we bled the hydroboost properly. The extra step of bleeding the hydraulic system makes it a bit more involved, but it’s manageable with patience.
Bleeding Brakes on Common Hydroboost Vehicles
Some vehicles with hydroboost systems have quirks. Here’s a table based on my experience:
| Vehicle | Hydroboost Type | Bleeding Notes |
|---|---|---|
| Dodge Ram (2000-2010) | No bleeder valve | Bleed through power steering, turn wheel |
| Ford F-250/F-350 (2005-2020) | Bleeder valve | Bleed valve while turning steering wheel |
| Chevy Silverado (2000-2015) | No bleeder valve | Bleed via power steering system |
| GMC Sierra (2000-2015) | Bleeder valve | Similar to Ford, bleed with steering motion |
Check your vehicle’s manual for specifics, as setups vary.
Manual vs. Vacuum Bleeding
You can bleed brakes manually (with a helper) or use a vacuum pump. Here’s how I decide:
Manual Bleeding: Needs a helper but is cheap and effective. I use this on my Ram with a friend pumping the pedal.
Vacuum Bleeding: Solo job, faster for some, but requires a vacuum pump. I tried this on my Jeep, but I prefer manual for hydroboost systems.
Manual bleeding is more common for hydroboost because it ensures air is fully removed from both brake and hydraulic systems.
When to Call a Professional
If you can’t get a firm pedal, keep sucking air into the system, or suspect a deeper issue (like a bad master cylinder or hydroboost unit), call a mechanic. I took my friend’s F-350 to a shop when the hydroboost kept pulling in air—it needed a new seal. Pros have tools like pressure testers to diagnose complex problems.
Preventing Air in the Brake System
To avoid needing to bleed brakes often, here’s what I do:
- Check Brake Fluid Regularly: Look at the reservoir every few months and top off if low.
- Inspect for Leaks: Check brake lines and the hydroboost unit for drips. I caught a leak early on my Honda.
- Avoid Running Dry: Never let the reservoir empty during repairs or bleeding.
- Service the System: Flush brake fluid every 2-3 years to remove water and debris.
These habits have kept my trucks’ brakes reliable.
What Not to Do When Bleeding Brakes with Hydroboost
I’ve made mistakes, so here’s what to avoid:
- Don’t Skip the Hydroboost: Bleeding only the brakes leaves air in the hydraulic system, causing soft pedals.
- Don’t Overtighten Bleeder Valves: You can strip them. I did this on my Chevy once—painful lesson.
- Don’t Use the Wrong Fluid: Check your manual for the right brake and power steering fluids.
- Don’t Ignore Steering Issues: Air in the hydroboost affects steering too—bleed it properly.
Practical Tips for Successful Brake Bleeding
Here are some tips to make bleeding brakes with hydroboost easier:
- Work with a Helper: It’s faster and ensures proper pedal pressure.
- Keep Fluids Topped Off: Check brake and power steering fluid levels frequently.
- Use Clear Tubing: Seeing bubbles helps you know when the system’s clear.
- Test Drive Carefully: Start with low speeds to confirm brake feel.
These tricks have saved me time and frustration on many jobs.
Get Your Brakes Feeling Solid
Learning how to bleed brakes with hydroboost is a game-changer for keeping your truck or SUV safe and responsive. It’s a bit more involved than standard brake bleeding, but with the right tools, a helper, and patience, you can get that firm pedal back.
I’ve done this on my Ram, my friend’s F-250, and more, and the steps I’ve shared work every time. Stay calm, follow the process, and keep your fluids topped off.
Maintain your brakes, check for leaks, and don’t skip the hydroboost bleeding step. Here’s to strong stops and confident drives!
Frequently Asked Questions
Why do my brakes feel spongy with a hydroboost system?
A spongy pedal usually means air in the brake lines or hydroboost unit. Bleeding both systems properly should fix it.
How long does it take to bleed brakes with hydroboost?
With a helper, it takes 1.5-3 hours for all four wheels and the hydroboost. Experience can cut it to 1-2 hours.
Can I bleed brakes with hydroboost by myself?
Yes, with a vacuum pump, but it’s easier with a helper to pump the pedal and ensure all air is removed.
What fluid should I use for bleeding a hydroboost system?
Use the brake fluid specified in your manual (usually DOT 3 or 4) and the correct power steering fluid for the hydroboost.
What if my brakes still feel soft after bleeding?
You might have missed air in the lines or hydroboost, or there’s a leak or faulty component. Re-bleed or consult a mechanic.