You’re driving along, and every time you hit the brakes, you hear a squeal that makes your teeth grind. Or maybe your car’s taking longer to stop than it used to. I spent years wrenching on cars—from my old Ford Mustang to a trusty Honda Civic—I know that sound and feel often mean it’s time to replace your brake pads.
Learning how to put new brake pads on a car is a great way to save money and keep your ride safe. It’s a job I’ve done countless times, and while it’s not rocket science, it takes some care to get it right.
I’ll walk you through the step-by-step process, share real-world stories from my garage, and give you tips to make it smooth. Whether you’re a beginner or a car enthusiast, I’ve got you covered. Let’s get those brakes quiet and stopping strong!
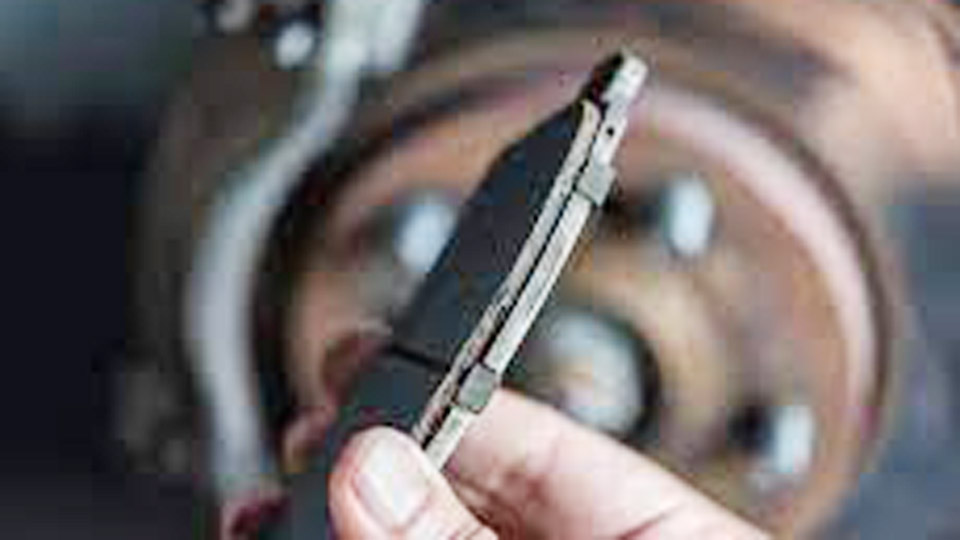
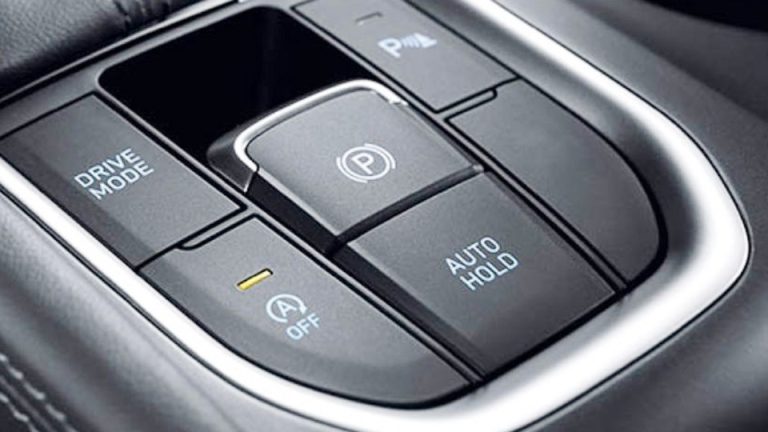
Image by indibloghub
Why Brake Pads Matter
Brake pads are the heart of your car’s braking system. They press against the rotors to create friction, slowing or stopping your wheels. Without good pads, your car’s braking power suffers, and that’s not just inconvenient—it’s dangerous.
I learned this the hard way when I ignored a squealing noise on my Jeep Wrangler, and the brakes started grinding metal-on-metal. Not a fun day. Replacing brake pads is one of the most common maintenance tasks, and doing it yourself can save you a trip to the shop.
Signs You Need New Brake Pads
Before we get our hands dirty, how do you know it’s time for new brake pads? Here’s what I look for based on years of experience:
Squealing Noise: Most brake pads have a metal wear indicator that squeals when the pads get thin. My Toyota Corolla did this at around 35,000 miles.
Grinding or Growling: If you hear grinding, the pads are likely worn out, and metal is scraping the rotor. This happened on my neighbor’s Chevy Silverado, and it cost extra to fix the rotors.
Longer Stopping Distances: If your car takes longer to stop, the pads might be worn or glazed. I noticed this on my Dodge Ram after heavy towing.
Brake Pedal Vibration: Worn pads can cause uneven rotor wear, leading to a shaky pedal. My Ford F-150 had this issue after a long road trip.
Brake Warning Light: Some cars have a dashboard light that signals low pad thickness. My friend’s BMW lit up, and sure enough, the pads were shot.
If you notice any of these, it’s time to check your brakes and likely replace the pads.
Tools and Parts You’ll Need
To put new brake pads on a car, you’ll need some basic tools and the right parts. Here’s what I keep in my garage for this job:
- Jack and jack stands: To lift and secure the car.
- Lug wrench: For removing wheels.
- Socket set or wrench: For brake caliper bolts (usually 10mm-19mm).
- C-clamp or caliper compressor tool: To push the caliper piston back.
- New brake pads: Make sure they match your car’s make, model, and year.
- Brake cleaner spray: To clean rotors and calipers.
- Brake grease or anti-seize: For lubricating caliper pins and pad contact points.
- Torque wrench: To tighten bolts and lug nuts to spec.
- Flathead screwdriver: For prying off clips or calipers.
- Gloves and safety glasses: To stay safe and clean.
- Optional: Brake rotor (if replacing): Check if rotors are worn or damaged.
I learned to keep a C-clamp handy after struggling with a sticky caliper piston on my Honda. Check your car’s manual for specific pad types—ceramic, semi-metallic, or organic—and get quality ones for better performance.
Step-by-Step Guide to Replacing Brake Pads
Ready to get started? I’ll walk you through how I replace brake pads, based on my experience with cars like my Mustang and Jeep. This guide is for disc brakes (most common in modern cars) and focuses on front brakes, though rears are similar. Always do both sides of an axle at once for even braking.
Step 1: Prepare Your Workspace
Park your car on a flat surface and engage the parking brake. Pop the hood and disconnect the negative battery terminal to avoid any electrical issues. Gather your tools and put on gloves and safety glasses. I always lay out my tools on a towel to keep things organized—saved me from losing a bolt under my Dodge once.
Step 2: Jack Up the Car and Remove the Wheel
Loosen the lug nuts on the wheel you’re working on, but don’t remove them yet. Use a jack to lift the car and secure it with jack stands—never work under a car held only by a jack. Remove the lug nuts and wheel. I had a close call with my Chevy when a jack stand wasn’t stable, so double-check your setup.
Step 3: Remove the Brake Caliper
Locate the brake caliper—it’s the metal piece over the rotor holding the pads. Find the two bolts (usually on the back) and loosen them with a socket or wrench. Carefully lift the caliper off the rotor and hang it with a wire or bungee cord—don’t let it dangle by the brake line. I damaged a brake line on my Toyota once by letting the caliper hang, so don’t skip this step.
Step 4: Remove the Old Brake Pads
The brake pads sit inside the caliper or on the caliper bracket. Slide them out, noting how they’re positioned. Some have clips or shims—keep these if they’re in good shape. My Honda’s pads had clips that I reused, but my Jeep’s were rusty and needed replacing. Check the caliper pins for wear and lubricate them with brake grease if they’re sticky.
Step 5: Inspect the Rotor
Look at the brake rotor (the shiny metal disc). If it’s smooth, you can reuse it. If it’s grooved, scored, or warped, consider replacing or resurfacing it. I had to replace the rotors on my F-150 because they were too worn to resurface. Use brake cleaner to clean the rotor surface for better pad contact.
Step 6: Compress the Caliper Piston
To fit the new, thicker pads, you need to push the caliper piston back. Use a C-clamp or caliper compressor tool to slowly press the piston into the caliper. Open the brake fluid reservoir cap (under the hood) first to avoid pressure buildup. I forgot this on my Mustang once, and it made the job harder than it needed to be.
Step 7: Install the New Brake Pads
Place the new brake pads in the caliper or bracket, matching the old pads’ orientation. Apply a thin layer of brake grease to the back of the pads (not the friction side) to reduce noise. If your pads came with new clips or shims, install them. My BMW’s pads had shims that made a huge difference in reducing squeal.
Step 8: Reinstall the Caliper
Slide the caliper back over the rotor and pads. Tighten the caliper bolts to the torque spec in your car’s manual (usually 20-40 ft-lbs). I use a torque wrench for this—overtightening can strip bolts, as I learned on my Dodge.
Step 9: Reinstall the Wheel
Put the wheel back on and hand-tighten the lug nuts. Lower the car off the jack stands, then use a torque wrench to tighten the lug nuts to spec (usually 80-100 ft-lbs). I always double-check the torque to avoid loose wheels.
Step 10: Repeat for the Other Side
Do the same process for the other wheel on the same axle. Uneven braking from replacing only one side is a recipe for trouble—I learned this when I tried to save time on my Chevy.
Step 11: Check Brake Fluid and Test
Close the brake fluid reservoir cap and reconnect the battery. Pump the brake pedal a few times to seat the pads against the rotors. Check the fluid level and top off if needed. Take a short test drive at low speeds to ensure the brakes feel firm and quiet. My Jeep felt like new after this step, but I always test carefully.
Time and Cost of Replacing Brake Pads
How long does this take? For a beginner, expect 1-2 hours per axle (both front or rear brakes). With experience, I can do it in about 45 minutes to 1 hour per axle. Professionals might take 30-60 minutes per axle, depending on the car.
Here’s a cost breakdown based on my experience:
| Item | Estimated Cost | Notes |
|---|---|---|
| Brake Pads (per axle) | $50-$150 | Ceramic pads cost more than semi-metallic. |
| Brake Rotors (per axle, optional) | $100-$250 | Only if replacing worn rotors. |
| Brake Grease/Cleaner | $10-$20 | Essential for a smooth job. |
| DIY Tools (if needed) | $50-$200 | C-clamp, torque wrench, etc. |
| Professional Labor | $100-$300 per axle | Varies by shop and car. |
I saved about $200 doing my Honda’s pads myself, but complex cars like my BMW sometimes go to a shop.
Choosing the Right Brake Pads
Not all brake pads are created equal. Here’s what I’ve learned about the main types:
| Pad Type | Pros | Cons | Best For |
|---|---|---|---|
| Ceramic | Quiet, low dust, long-lasting | Expensive | Daily drivers, luxury cars |
| Semi-Metallic | Durable, good for towing | Noisy, more dust | Trucks, performance cars |
| Organic | Cheap, quiet | Wear out faster | Older or low-mileage cars |
I use ceramic pads on my Honda for quiet braking, but semi-metallic on my F-150 for towing power. Check your car’s manual for recommendations.
Common Brake Pad Replacement Issues
Sometimes, things don’t go smoothly. Here’s what I’ve run into:
- Stuck Caliper Bolts: Rusty bolts can be tough to remove. I use penetrating oil and patience—learned this on my Jeep.
- Sticky Caliper Piston: If it won’t compress, the caliper might need cleaning or replacing. My Dodge had this issue.
- Worn Rotors: If rotors are too thin or damaged, replace them. I missed this on my Chevy and had to redo the job.
- Brake Noise After Replacement: Usually from missing grease or shims. I fixed a squeal on my Toyota by adding grease.
Why Brake Pads Wear Out
Brake pads don’t last forever. Here’s what wears them down:
- Driving Style: Hard braking or frequent stops wear pads faster. My city-driven Mustang ate pads quicker than my highway-driven Honda.
- Vehicle Weight: Heavier cars like my F-150 wear pads faster, especially when towing.
- Road Conditions: Dusty or hilly areas increase wear. My Jeep’s pads wore out fast after off-roading.
- Pad Quality: Cheap pads wear out sooner. I learned this with bargain pads on my Dodge—they barely lasted 20,000 miles.
DIY vs Professional Brake Pad Replacement
Should you do it yourself? Here’s how I decide:
DIY Replacement
If you’ve got basic tools and a bit of confidence, replacing brake pads is straightforward. I did my Toyota’s pads in my driveway with no issues. You’ll save on labor, but it takes time and care to avoid mistakes.
Professional Replacement
A shop is faster—usually under an hour per axle—and comes with a warranty. I took my BMW to a mechanic because the caliper was tricky. If you’re unsure or lack tools, a pro is worth it.
Preventing Brake Pad Problems
To make your brake pads last longer, here’s what I do:
- Drive Smoothly: Ease into stops to reduce wear.
- Check Pads Regularly: Inspect them during oil changes or tire rotations.
- Clean Rotors: Remove dust and debris to prevent uneven wear.
- Use Quality Pads: Better pads last longer and perform better.
These habits have kept my cars’ brakes in great shape.
What Not to Do When Replacing Brake Pads
I’ve made mistakes, so here’s what to avoid:
- Don’t Let the Caliper Dangle: Always secure it to avoid brake line damage.
- Don’t Skip Grease: Ungreased pads or pins can squeal.
- Don’t Reuse Worn Rotors: If they’re damaged, replace them.
- Don’t Overtighten Bolts: Use a torque wrench to avoid stripping.
I learned the grease lesson on my Toyota—squeaky brakes are no fun.
Practical Tips for a Smooth Brake Pad Replacement
Here are some tips to make the job easier:
- Buy Quality Pads: They last longer and reduce noise.
- Work on Both Sides: Replace pads on both wheels of an axle for even braking.
- Check the Manual: Torque specs and pad types vary by car.
- Test After Installation: A short drive ensures everything’s working right.
These tricks have saved me time and headaches.
Stop with Confidence
Learning how to put new brake pads on a car is a rewarding skill that keeps your ride safe and saves you money. It’s a job I’ve done on everything from my Mustang to my friend’s Nissan, and with the right tools and care, you can do it too. From spotting worn pads to installing new ones, this guide covers it all—whether you’re a beginner or a gearhead.
Keep up with maintenance, listen for warning signs, and don’t skimp on quality parts. Here’s to quiet, strong brakes and safe drives ahead!
Frequently Asked Questions
How do I know when my brake pads need replacing?
Listen for squealing or grinding noises, check for longer stopping distances, or look for a brake warning light. Pads thinner than 1/4 inch need replacing.
Can I replace brake pads myself?
Yes, with basic tools like a jack, wrench, and C-clamp, it’s a DIY-friendly job. It takes 1-2 hours per axle for beginners.
How much does it cost to replace brake pads?
DIY costs $50-$150 per axle for pads, plus $100-$250 if rotors are needed. Professional jobs run $150-$450 per axle with labor.
How long do brake pads last?
Typically 30,000-70,000 miles, depending on driving style, car weight, and pad type. Heavy braking or towing wears them faster.
What happens if I don’t replace worn brake pads?
Worn pads can damage rotors, increase stopping distances, and reduce safety. Grinding means metal-on-metal contact, which is costly to fix.