You’re driving along, enjoying a sunny afternoon, when you hear a grinding or humming noise from the front of your car. It gets louder when you turn, and you’re thinking, “Uh-oh, what’s going on?” As someone who’s spent years tinkering with cars—from my trusty old Ford Mustang to a zippy Honda Civic—I’ve been there.
That noise is often a sign of worn-out wheel bearings, and knowing how to replace front wheel bearings on a car can save you a trip to the shop and a chunk of change.
I’m going to walk you through the process step-by-step, share some real-life stories from my garage, and give you tips to make the job easier. Whether you’re a beginner with a wrench or a seasoned gearhead, I’ve got you covered.
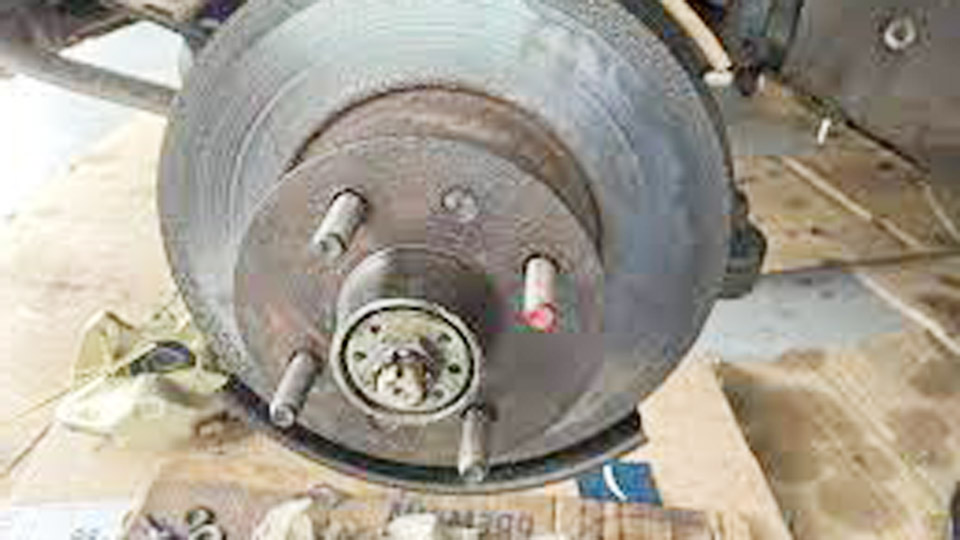
Image by alfabb
What Are Wheel Bearings and Why Do They Matter?
Before we dive into the how-to, let’s talk about what wheel bearings do. These little guys are small, ring-shaped components packed with tiny steel balls or rollers, sitting inside your car’s wheel hub. They let your wheels spin smoothly with minimal friction while supporting the car’s weight.
When they wear out, you’ll hear noises like grinding, humming, or even a low growl, especially when turning. I first noticed this on my Jeep Wrangler after some off-roading—the front wheels were making a racket, and it was time for new bearings.
Bad wheel bearings aren’t just annoying; they can affect handling and, if ignored, cause serious damage. Replacing them isn’t too hard if you’ve got the right tools and a bit of patience. Let’s break it down.
Signs Your Front Wheel Bearings Need Replacing
How do you know it’s time to replace those bearings? Here’s what I look for based on years of working on cars:
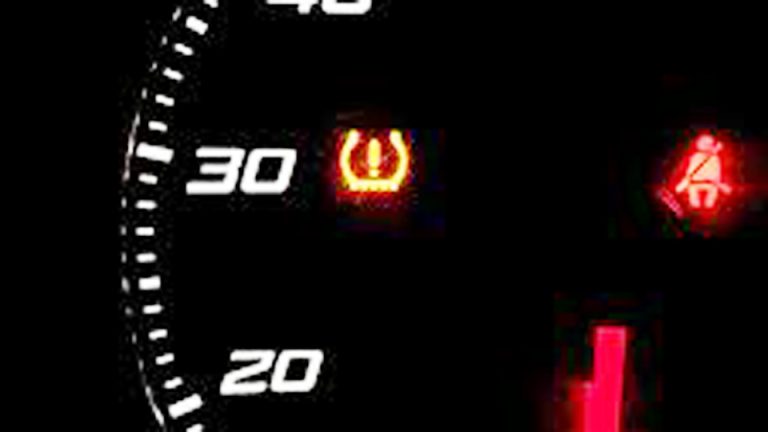
Grinding or Humming Noise: A low hum or grind that gets louder with speed or during turns. My Dodge Ram had this, and it was unmistakable.
Steering Vibration: If the steering wheel shakes, especially at higher speeds, the bearings might be worn.
Uneven Tire Wear: Worn bearings can cause tires to wear unevenly. I saw this on my neighbor’s Toyota Corolla.
Play in the Wheel: Jack up the car and wiggle the wheel. If it moves side to side, the bearings are likely shot.
I ignored the hum in my Chevy once, thinking it was something else. Big mistake—the bearing started to seize, and I was lucky to catch it before it damaged the hub.
Tools and Parts You’ll Need
Replacing front wheel bearings requires some specific tools and parts. Here’s what I keep in my garage for this job:
- Socket set and ratchet: For removing bolts and nuts.
- Wrenches: For loosening brake caliper bolts and other fittings.
- Jack and jack stands: To lift and secure the car.
- Lug wrench: To remove the wheel.
- Bearing puller or slide hammer: For removing old bearings (some cars need this).
- Bearing press or hammer and drift: For installing new bearings.
- Torque wrench: To tighten bolts to the right specs.
- New wheel bearings: Make sure they match your car’s make and model.
- Bearing grease: To pack the new bearings.
- Brake cleaner: To clean the hub and surrounding parts.
- Gloves and safety glasses: Because safety first!
I learned to keep a bearing puller handy after struggling with my Ford F-150’s stuck bearings. It’s a game-changer.
Step-by-Step Guide to Replacing Front Wheel Bearings
Ready to get your hands dirty? Here’s how I replace front wheel bearings, based on my experience with cars like my Jeep and Honda. This guide assumes you’re working on a common front-wheel-drive or rear-wheel-drive car with a standard hub assembly. Some vehicles, like certain trucks, may have slightly different setups, so check your car’s manual.
Step 1: Prepare Your Workspace
Park your car on a flat surface and engage the parking brake. Pop the hood and disconnect the negative battery terminal to avoid any electrical mishaps. I always set up my tools nearby and put on gloves and safety glasses. When I did this on my Mustang, having everything organized saved me a ton of time.
Step 2: Jack Up the Car and Remove the Wheel
Use a lug wrench to loosen the lug nuts on the front wheel, but don’t remove them yet. Jack up the car and secure it with jack stands—never work under a car held only by a jack. Remove the lug nuts and wheel. I had a scare once with my Dodge when a jack stand wasn’t secure, so double-check your setup.
Step 3: Remove the Brake Components
To access the wheel hub, you’ll need to remove the brake caliper and rotor. Start by loosening the caliper bolts (usually two) with a wrench or socket. Carefully lift the caliper off and hang it with a wire or bungee cord—don’t let it dangle by the brake line. I learned this trick after damaging a brake line on my Chevy.
Next, remove the brake rotor. It might slide off easily or need a tap with a rubber mallet if it’s stuck. Some cars have a caliper bracket that needs to come off too—check your setup.
Step 4: Remove the Wheel Hub Assembly
The wheel bearing is usually inside the hub assembly. Remove the hub by undoing the bolts or nuts holding it to the steering knuckle. This can take 10-20 minutes, depending on your car. My Honda Civic’s hub came off easily, but my Jeep’s was rusted and needed some persuasion with a mallet.
If your car has a pressed-in bearing (common in older models), you’ll need to remove the hub and take it to a press or use a slide hammer to extract the bearing. This can add time to the job.
Step 5: Remove the Old Bearing
If the bearing is part of the hub assembly (common in newer cars), you’re replacing the whole unit, so skip to installing the new one.
For pressed-in bearings, use a bearing puller or slide hammer to remove the old bearing from the hub. This took me about 15 minutes on my Ford, but it can be tricky if the bearing’s seized.
Clean the hub and knuckle with brake cleaner to remove dirt and grease. I always do this to make sure the new bearing seats properly.
Step 6: Install the New Bearing
For hub assemblies, bolt the new unit onto the steering knuckle, making sure it’s aligned properly. Use a torque wrench to tighten the bolts to your car’s specs (check the manual). For pressed-in bearings, use a bearing press or a hammer and drift to carefully press the new bearing into the hub. Pack it with bearing grease first for smooth operation.
I messed this up once on my Toyota by not greasing the bearing enough, and it started making noise a month later. Don’t skip the grease!
Step 7: Reassemble the Components
Reinstall the brake rotor and caliper, tightening all bolts to spec. Put the wheel back on and hand-tighten the lug nuts. Lower the car off the jack stands, then use a torque wrench to tighten the lug nuts properly. I always double-check the torque on my wheels after a job like this—loose lug nuts are no joke.
Step 8: Test Drive and Check
Reconnect the battery and take the car for a short test drive. Listen for any noises and check for smooth steering. If you hear grinding or feel vibrations, something’s off—recheck your work or get a pro to look at it. My Jeep felt like new after I replaced the bearings, but I always test carefully.
Time and Cost of Replacing Front Wheel Bearings
How long does this job take? For a professional mechanic, replacing a front wheel bearing typically takes 1 to 2 hours per side, depending on the car’s design.
If you’re doing it yourself, expect 2 to 4 hours per side as a beginner, or 1.5 to 3 hours if you’re experienced. Pressed-in bearings take longer than hub assemblies.
Here’s a cost breakdown based on my experience:
| Item | Estimated Cost | Notes |
|---|---|---|
| Wheel Bearing/Hub Assembly | $50-$250 | Varies by car; hub assemblies cost more. |
| Labor (Professional) | $100-$300 per side | Depends on shop rates and complexity. |
| DIY Parts Cost | $50-$250 | Plus tools if you don’t own them. |
| Bearing Press Rental | $20-$50 | If needed for pressed-in bearings. |
I saved money by doing my Honda’s bearings myself, but I paid a shop for my BMW because the hub was a pain to access.
Common Car Models and Their Wheel Bearing Quirks
Different cars have different setups. Here’s a table of popular models and what to expect:
| Car Make/Model | Bearing Type | Notes |
|---|---|---|
| Honda Civic (2000-2010) | Hub Assembly | Easy to replace, about 1-1.5 hours. |
| Toyota Corolla (2005-2015) | Hub Assembly | Straightforward but check torque specs. |
| Ford F-150 (2010-2020) | Pressed-In | May need a press; takes 2-3 hours. |
| Jeep Wrangler (2007-2018) | Hub Assembly | Rust can make removal tricky. |
| BMW 3 Series (2015+) | Hub Assembly | Tight engine bay, may need pro help. |
This is based on my experience—your car might be different, so check the manual.
Why Wheel Bearings Fail
Wheel bearings don’t last forever. Here’s what I’ve seen cause them to wear out:
- Wear and Tear: Constant spinning and weight-bearing wear them down over time.
- Dirt and Water: Road grime or water can seep in, damaging the bearings. My Jeep’s bearings failed after a muddy off-road trip.
- Poor Lubrication: Not enough grease can cause friction and wear.
- Impact Damage: Hitting potholes or curbs can damage bearings. I saw this on my neighbor’s Nissan after a rough winter.
Knowing these causes helps you prevent future failures.
DIY vs Professional Repair
Should you tackle this yourself? Here’s how I decide:
DIY Repair
If you’ve got basic tools and some mechanical know-how, replacing wheel bearings is doable. It took me about 2 hours per side on my Honda, but I had to borrow a bearing press for my Ford. You’ll save on labor, but it’s time-consuming and requires care.
Professional Repair
A shop will cost more but get it done faster—usually 1-2 hours per side. I took my BMW to a mechanic because the tight setup was beyond my patience. If you’re not confident, a pro is worth it.
Preventing Wheel Bearing Issues
To keep your bearings happy, here’s what I do:
- Drive Carefully: Avoid potholes and rough roads when possible.
- Check for Noises: Listen for humming or grinding and address it early.
- Regular Maintenance: Have your suspension and bearings checked yearly.
- Keep It Clean: Wash off mud and grime after off-roading to protect seals.
These habits have kept my cars’ bearings in good shape for years.
What Not to Do When Replacing Wheel Bearings
I’ve made mistakes, so here’s what to avoid:
- Don’t Skip the Torque Wrench: Loose or overtightened bolts can cause failures.
- Don’t Reuse Old Bearings: They’re worn for a reason—replace them.
- Don’t Ignore Safety: Always use jack stands, not just a jack.
- Don’t Skimp on Grease: Ungreased bearings fail faster.
I learned the grease lesson the hard way on my Toyota—don’t make my mistake.
Practical Tips for a Smooth Repair
Here are some tips to make the job easier:
- Buy Quality Bearings: Cheap ones fail sooner. Spend a bit more for reliability.
- Check Torque Specs: Use your car’s manual to tighten bolts correctly.
- Work Clean: Clean the hub before installing new bearings to avoid contamination.
- Test Thoroughly: Take a test drive to ensure everything’s smooth.
These tricks have saved me headaches on many repairs.
Wrapping It Up
Replacing front wheel bearings on a car isn’t the easiest job, but it’s doable with the right tools and know-how. Whether you’re tackling it yourself or heading to a shop, you now know what to expect—1 to 2 hours for pros, 2 to 4 hours for DIY.
I’ve been through this with my own cars, and trust me, the satisfaction of silencing that grind is worth the effort.
Keep your car maintained, listen for warning signs, and don’t skimp on quality parts. With these steps, you’ll keep your wheels spinning smoothly and enjoy the road without that annoying noise. Here’s to quiet, safe driving!
Frequently Asked Questions
How do I know if my front wheel bearings are bad?
Listen for a grinding or humming noise that gets louder with speed or turns. You might also feel steering vibrations or notice uneven tire wear.
Can I drive with a bad wheel bearing?
You can for a short time, but it’s risky. A failing bearing can seize, causing wheel damage or loss of control. Fix it ASAP.
How much does it cost to replace front wheel bearings?
Expect $150-$550 per side, including parts ($50-$250) and labor ($100-$300). DIY saves on labor but requires tools.
Do I need special tools to replace wheel bearings?
Yes, you’ll need a socket set, wrenches, jack stands, and possibly a bearing press or puller for pressed-in bearings.
How can I prevent wheel bearing failure?
Drive carefully, avoid potholes, keep bearings greased, and check for noises during regular maintenance.