Ever popped the hood of your car and noticed the headlights have this sleek, curved shape on the back? It’s not just for looks. If you’ve ever wondered why are the back surfaces of automobile headlights curved, you’re in the right place. As a gearhead who’s spent countless hours tinkering with cars—from my old Chevy Camaro to my wife’s Subaru Outback—I’ve dug into the nuts and bolts of headlight design.
That curved back isn’t just a stylistic choice; it’s a clever engineering trick that improves light output, safety, and durability. Let’s break down why this matters, how it works, and what it means for car owners, DIY mechanics, and enthusiasts across the USA.
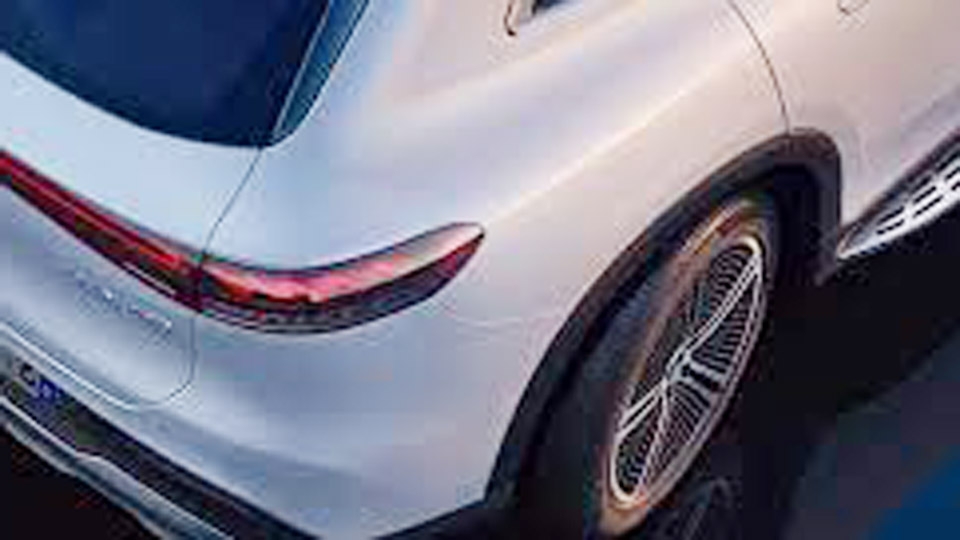
Image by mercedes-benz
Science Behind Curved Headlight Surfaces
Headlights aren’t just bulbs in a housing—they’re precision-engineered systems designed to light up the road safely. The curved back surface, often called the reflector, is a key player in this setup. Its parabolic or elliptical shape focuses light from the bulb into a controlled beam that illuminates the road without blinding oncoming drivers.
Here’s how it works: the bulb sits at the focal point of the curved reflector. When the bulb emits light, the reflector catches those rays and redirects them forward in a tight, organized pattern. Think of it like a flashlight versus a bare bulb. A bare bulb scatters light everywhere, but a flashlight’s curved reflector shapes the light into a useful beam. That’s exactly what your headlight’s curved back does.
Why does this matter? A well-focused beam means better visibility at night, especially on dark rural roads or during stormy weather in places like Michigan or Oregon. Without that curve, you’d get dim, scattered light that’s useless for driving. I learned this firsthand when I tried retrofitting an old halogen bulb into a headlight housing without a proper reflector—let’s just say the road looked more like a candlelit dinner than a well-lit highway.
Types of Headlight Technologies and Their Curved Designs
Not all headlights use the same curved reflector design, and the type of headlight in your car affects how that curve is implemented. Let’s look at the main types you’ll find in vehicles across the USA.
Halogen Headlights
Halogen headlights are the most common, especially in older or budget-friendly cars like the Honda Civic or Ford F-150. They use a tungsten filament in a gas-filled bulb, paired with a parabolic reflector. The curve on the back is usually deep and bowl-shaped to maximize light focus.
Pros: Affordable, easy to replace, widely available.
Cons: Less bright than newer tech, shorter lifespan (500–1,000 hours), generates heat.
HID (Xenon) Headlights
High-Intensity Discharge (HID) headlights, found in many luxury or mid-range cars like the BMW 3 Series, use xenon gas to create a bright, white light. Their reflectors are often shallower but still curved, designed to work with a projector lens for precise beam control.
Pros: Brighter than halogen, longer lifespan (2,000–3,000 hours), energy-efficient.
Cons: Expensive to replace, requires ballast, can glare if misaligned.
LED Headlights
LED headlights are the modern standard in cars like the Tesla Model 3 or newer Toyota Corollas. They use multiple light-emitting diodes and often have complex, multi-curved reflectors or no reflector at all, relying on lenses to shape the beam.
Pros: Extremely bright, long-lasting (up to 20,000 hours), low heat output.
Cons: Costly to repair, complex to retrofit, may need cooling systems.
Laser Headlights
Rare in the USA but popping up in high-end models like some BMWs, laser headlights use laser diodes and phosphor to create intense light. Their curved reflectors are highly precise to handle the concentrated beam.
Pros: Incredible brightness, long range, energy-efficient.
Cons: Very expensive, not DIY-friendly, limited availability.
| Headlight Type | Reflector Shape | Brightness | Lifespan | Cost (Replacement Pair) |
|---|---|---|---|---|
| Halogen | Deep parabolic | Moderate | 500–1,000 hours | $20–$50 |
| HID | Shallow elliptical | High | 2,000–3,000 hours | $100–$200 |
| LED | Multi-curved or lens-based | Very High | Up to 20,000 hours | $150–$500 |
| Laser | Precision-curved | Extreme | 10,000+ hours | $1,000+ |
For most drivers, halogen or LED headlights are the go-to, depending on your car and budget. If you’re in a snowy state like Colorado, LEDs are a great choice because they don’t rely as heavily on reflectors and resist fogging better.
Why Curved Reflectors Matter for Safety
The curved back of a headlight isn’t just about brightness—it’s a safety feature. A properly shaped reflector ensures the light beam hits the road where you need it, like on curves or at intersections. It also minimizes glare for oncoming drivers, which is a big deal on busy highways like I-95 in Florida or I-80 in Nebraska.
Poorly designed or damaged reflectors can cause problems. If the curve is worn, cracked, or misaligned, the light scatters, reducing visibility and increasing glare. I once helped a buddy fix his Dodge Ram’s headlights after he noticed they were barely lighting the road. The reflector’s chrome coating had peeled, turning his headlights into dim, useless glows. A replacement housing fixed it, but it was a reminder of how critical that curve is.
Real-World Tip: If your headlights seem dim even with new bulbs, check the reflector for clouding or damage. It’s often cheaper to replace the whole housing than to live with poor visibility.
How to Maintain Headlight Reflectors for Optimal Performance
Keeping those curved reflectors in top shape is key to safe driving. Here’s a step-by-step guide based on what I’ve done in my own garage to maintain headlights on everything from my Jeep Wrangler to my neighbor’s Toyota RAV4.
Step 1: Inspect the Headlight Housing
Check the headlight lens and housing for cracks, clouding, or moisture. A foggy lens or water inside the housing can distort the reflector’s performance. If you see condensation, the seal is likely broken, and you’ll need to replace or reseal the housing.
Step 2: Clean the Lens
A hazy lens scatters light, making even a perfect reflector useless. Use a headlight restoration kit like the 3M Headlight Lens Restoration System. Sand the lens with the provided pads, then polish with a compound. Finish with a UV sealant to prevent future yellowing.
My Experience: I restored the headlights on my old Camaro with a $20 kit, and it was like night and day. The reflectors could finally do their job, and the road lit up like a stadium.
Step 3: Check Bulb Alignment
If you’ve replaced bulbs recently, ensure they’re seated correctly. A misaligned bulb won’t sit at the reflector’s focal point, reducing light output. Most headlights have adjustment screws to fine-tune the aim—check your owner’s manual for specifics.
Warning: Don’t touch halogen or HID bulbs with bare fingers. Skin oils can cause hot spots, shortening bulb life. Use gloves or a clean cloth.
Step 4: Inspect the Reflector
Look inside the housing with a flashlight. If the reflector’s chrome is peeling or discolored, it’s time for a new housing. DIY reflector repair is tricky and often not worth the hassle compared to a $50–$100 replacement housing.
Step 5: Test at Night
After cleaning or replacing parts, test your headlights at dusk on a quiet road. Aim them at a flat surface like a garage door from 25 feet away. The beam should be even, with a sharp cutoff to avoid blinding others.
| Maintenance Task | Frequency | Tools Needed | Cost |
|---|---|---|---|
| Clean lens | Every 6–12 months | Restoration kit, microfiber cloth | $10–$30 |
| Check bulb alignment | After bulb replacement | Screwdriver, owner’s manual | $0 |
| Inspect reflector | Annually | Flashlight | $0 |
| Replace housing | As needed | Screwdriver, new housing | $50–$200 |
Pro Tip: Keep a spare set of bulbs in your glovebox. I learned this after a late-night bulb failure on a rural Ohio road—nothing like driving with one headlight to make you appreciate preparation.
Common Headlight Problems and Fixes
Curved reflectors are great, but they’re not immune to issues. Here are the most common problems I’ve seen in my years of wrenching, along with fixes.
Cloudy or Yellowed Lenses
Cloudy lenses block light, making the reflector less effective. Use a restoration kit or replace the housing if the damage is severe. Regular cleaning prevents buildup.
Burned-Out Bulbs
Bulbs burn out over time, especially halogens. Replace them in pairs for even lighting. If you’re upgrading to LEDs, ensure your car’s wiring can handle them—some older models need adapters.
Damaged Reflectors
Peeling or cracked reflectors are a death sentence for headlight performance. Replace the housing, as aftermarket reflectors are hard to source and align.
Misaligned Headlights
If your headlights are aiming too high, low, or off-center, they’re not using the reflector effectively. Adjust the screws on the housing, or take your car to a shop for professional alignment.
Real-World Example: My neighbor’s RAV4 had one headlight pointing at the trees after a minor fender bender. A quick adjustment with a Phillips screwdriver fixed it, but it showed how even a small misalignment can throw off the reflector’s focus.
Upgrading Your Headlights for Better Performance
If your car’s headlights are struggling, upgrading can make a huge difference. Here’s how to choose the right upgrade for your needs, whether you’re a daily commuter or a weekend cruiser.
Switching to LED Bulbs
LED retrofit kits, like those from Philips or Sylvania, offer brighter light and longer life. They’re plug-and-play for most modern cars but may require a CANbus adapter for vehicles with sensitive electronics, like newer Dodges or VWs.
Pros: Bright, efficient, long-lasting.
Cons: Can cause glare if not designed for your reflector, pricey upfront.
Upgrading to Projector Headlights
Projector headlights use a lens instead of a reflector to focus light, offering a sharper, more controlled beam. Aftermarket kits are available for many models, like the Ford Mustang or Jeep Wrangler.
Pros: Precise beam, modern look, great for HIDs or LEDs.
Cons: Expensive ($200–$1,000), complex installation.
Installing New Housings
If your reflectors are shot, a new housing with a fresh reflector and lens can restore performance. Brands like TYC or Depo offer OEM-quality replacements for most cars.
Pros: Restores factory performance, affordable for common models.
Cons: Labor-intensive to install, fitment varies by brand.
My Pick: For my Jeep, I swapped to an LED-compatible housing with a projector lens. It took a weekend to install, but the light output is incredible, especially on dark backroads.
Tips for Headlight Care in US Climates
Driving conditions in the USA vary wildly—from Florida’s humid coastal roads to Montana’s snowy mountain passes. Here’s how to keep your headlights performing in different environments.
Coastal Areas: Salt air can corrode reflectors and cloud lenses. Rinse your headlights with fresh water monthly and apply a UV sealant.
Snowy Regions: Ice can build up on lenses, reducing reflector efficiency. Use a plastic scraper and keep winter-grade washer fluid handy.
Desert Climates: UV rays in places like Arizona can yellow lenses fast. Apply a UV-resistant coating like Cerakote Headlight Coating annually.
Urban Driving: Road grime and pollution can coat lenses. Clean them weekly with glass cleaner to maintain reflector performance.
Common Mistakes to Avoid
Even experienced DIYers mess up headlight maintenance. Here’s what to watch out for:
Using Harsh Cleaners: Household cleaners like Windex can degrade lens coatings. Stick to automotive-grade products.
Mixing Bulb Types: Don’t put an LED bulb in a halogen reflector—it’ll scatter light and cause glare. Use bulbs designed for your housing.
Ignoring Alignment: Misaligned headlights are dangerous. Always check aim after replacing bulbs or housings.
Skipping UV Protection: Unprotected lenses yellow faster, especially in sunny states. Always seal restored lenses.
Conclusion
The curved back surfaces of automobile headlights are more than just a design quirk—they’re a critical piece of engineering that ensures you can see and be seen on the road. By focusing light into a precise beam, these reflectors improve safety, especially in tough US driving conditions like snowy winters or dark rural highways.
Whether you’re maintaining your existing headlights, upgrading to LEDs, or restoring a cloudy lens, a little know-how goes a long way. Keep those reflectors clean, check your bulbs regularly, and you’ll be ready for any drive, day or night.
FAQ
Why do my headlights look dim even with new bulbs?
Dim headlights can result from cloudy lenses, damaged reflectors, or misalignment. Clean or restore the lenses, inspect the reflector for peeling, and adjust the aim.
Can I use LED bulbs in a halogen headlight housing?
Not always. LED bulbs in halogen reflectors can cause glare or poor beam patterns. Check if your housing is LED-compatible or opt for a projector retrofit.
How often should I clean my headlight lenses?
Clean lenses every 1–2 months, or more often in salty or polluted areas. Use a restoration kit every 6–12 months to prevent yellowing.
Why do my headlights fog up inside?
Fogging happens when the housing seal fails, letting moisture in. Reseal the housing with silicone or replace it to protect the reflector.
Are aftermarket headlight housings as good as OEM?
Quality varies. Brands like TYC or Depo are reliable for most models, but check reviews for fitment. OEM is best for precision but costs more.